Saturday, 18 October 2014

Easy Halloween Ghosts


Halloween  is almost here! I made some super easy ghosts which will be great for both small and big kids (and with big kids I mean adults :-D ).
I recycled my old shirt for this project, but any fabric will do. 
Here's few easy steps of "how to", enjoy!


And finally, hang the ghost !
 
Happy Halloween all,
 
- Mari

Tuesday, 7 May 2013

DIY: Branch display

 
A while ago I found a gorgeous picture from pinterest, of drifted wood photo display by Erlend. He has a lot of great and unique DIY's and tutorials (including the drifted wood photo display) here: http://www.morningcreativity.com

I didn't have time to go to the beach and collect drifted wood, but the idea just didn't leave me alone. So this morning I saw a branch under a tree, and took it home with me. I wanted my display to be wider than Erlends, so I modified the "design" a bit.
I cleaned the branch,  saw it to the size I wanted, and spray painted it (with white). After the paint had dried, I drilled  holes to the branch for the string. The holes are about 7 cm apart from each other.
Then I thread the string through the holes, tied a knot to the other end and let the other end hang loose. And that's it! You can hang anything you want to this: kids art, photos, small decorations or a mix of things, like I did.


And here's the display with autumn leaves.


Sunday, 5 May 2013

Tissuepaper flowers


This craft project is perfect for small crafters - from 3 years and up. A great gift for mothers day, for teacher or for birthday. Gorgeous flower that never wither!
In case you want excatly the same materials I have used in this project, please visit at my webshop: www.rainydaysjoy.com.au/materials.html . 4 pcs of A5 cardboard 1,50 aud and a bag of circle tissue paper shapes 2,00 aud (these make 4 flowers).

You'll need:

Some cardboard (A5 is enough)
Scissors
Circle shapes (use circle punch or cut with scissors using a coin as a template) from tissue paper.
Glue

And this is how:

Thursday, 18 April 2013

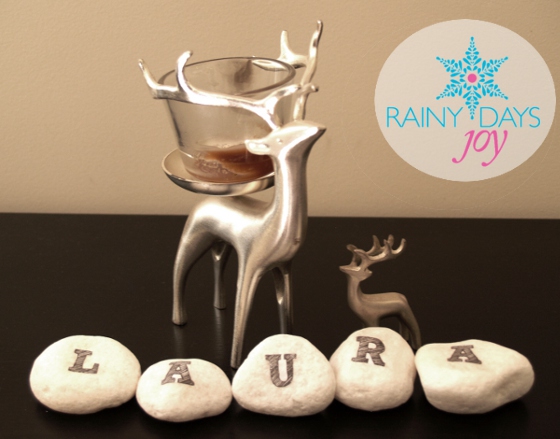
Decorating stones with printed letters and stamped tissue papers


Seems there is something about stones I can not resist :-D . So I had to play a bit with them again... This time I pirnted some letters to a normal white office paper, cut them out, and glued them to the stone with a water-glue mix. The mix is easy: 50% water, 50% PVA glue. Use it as you would use modge pod; add some directly to the stone, then place the letter, then add some more over the letter (like you would paint over it). Let dry, and that's it. Looks nice.


These I made using the same techique as the letter stones, but this time I used a stamp and a tissue gift wrap paper.


----------
Would you like to get even more inspiring party, decoration and craft ideas? Then like Rainy Days Joy at Facebook, www.facebook.com/RainyDaysJoy . Thanks for your support!

Monday, 15 April 2013

Felt dahlia tutorial

A year ago I learned how to make felt-dahlias. I decorated one of our old gray pillowcovers with them, to bring a bit more petrol-blue to our livingroom's colour scheme.


Today I got an idea to decorate the lids of my glass jars with them. It worked perfectly! So these are old glass jars,  I 've taken the labels off and painted the lid with white spary paint. Then when the flowers were ready, I glued them to the lid.


 So, here you are:


You'll need some felt and a hot glue gun.
 
First cut the petals. 12 bigger ones and 15 smaller ones. Just use "free hand" when you cut them, my bigger petals were 2,5 cm long and the smaller were about 2 cm long.
Cut a circle as a base (diameter about 6 cm), and a small circle to the centre. Cut a small "fringe" to the centre-piece (see the picture).


Glue all the lower parts of the petals together.

Start gluing the outer circle of petals to the base, the bigger petals. I always start my gluing the as you can see on the picture, to make sure I am placing the petals evenly.

Continue with the second, and then the third layer.

In the end, glue the center.

This project is a bit messy - there was a lot of glue on my fingers, but the outcome was really nice! Hope you had fun with this tutorial. !

Tuesday, 9 April 2013

Mini kitchen update with zero budget

One corner of our kitchen was a total mess with several different overflowing jars, cans and canisters. With some old glass jars, cans, tags and spray paint I created a bit more harmonic set.


1. This is an old (Bodyshop) shampoo bottle. I peeled the labels off, and rolled some twine around it. Then I filled it with dishwashing liquid. It looks much better at the kitchen table than that original big, ugly bottle.
2. My daughter loves to collect shells. Nearly every time we go to the beach, she brings a small bag of shells to home. I decided, that from now on, I will put them to glass jar, and decorate it with a tag where they were collected and when. Those jars will be a great centerpiece one day.
3. We try to remember to take our vitamins every day. I've noticed that if the vitamin cans are somewhere you can see them all the time, it's easier to remember to take them. But the cans are a bit ugly, so I had to do something for that. I painted the lids with white spray paint and printed the tags - now they look nice enough so you don't have to hide them.
4. We have kept a lot of plastic bottles because  we use them as drinking bottles when we go hiking or to the beach. It's handy to have one jar for the caps, and always take and return the caps there. Otherwise you can never find one when you need it. This tin can is spray painted with the same white as I used to paint the lids.
5. Kitchen scissors are also always lost when you need them. So I made a glass jar just for them -  and glued (with really good quality craft glue) some glass stone decorations to it (glass stones from Bunnings).

All this took only 30 minutes (+ drying time for the paint and glue) to make, and everything I used I already had. Hope this will give some ideas for you too!


Friday, 5 April 2013

Wall Decoration

Easter is now over, and when I took the "easter down" from the walls, there was some empty spots . They were screaming some wall decorations. I also had some leftover-cardboard on hand, so this is what came out from that.

I didn't use any glue to make this, the rolls and decorations are attached to each other with a mini stapler.
First I sliced the cardboard to stripes, making sure they were about the same widith. The length does not matter.
 
 
Then I made a lot of different sizes of rolls/cyliners by stapling the ends of the stripes together.
Then I stapled all of them toghether and formed a big round circle. 


Then I decorated it a bit by twisting the paper around a pen and stapled them inside of the cylinders. In the end I also stapled couple of the twisted decorations outside the cylinders.
 It does look really nice. I used different shades of blue and gray cardboard.
This is almost mess-free project and I can recommend it also for kids, around 8 years and up.