
Friday, 15 March 2013
Easy Easter Bunny decoration
I was supposed to do something completely different today(administrational tasks), but some kind of easter creativity burst hit me. You know when you'll get an idea, and it haunts you till you've tried it....so here's the outcome. Fast, cute and simple enough for the smallest crafters; Easter bunny wall decoration.

Wednesday, 6 March 2013
DIY Easy Easter Wreath tutorial
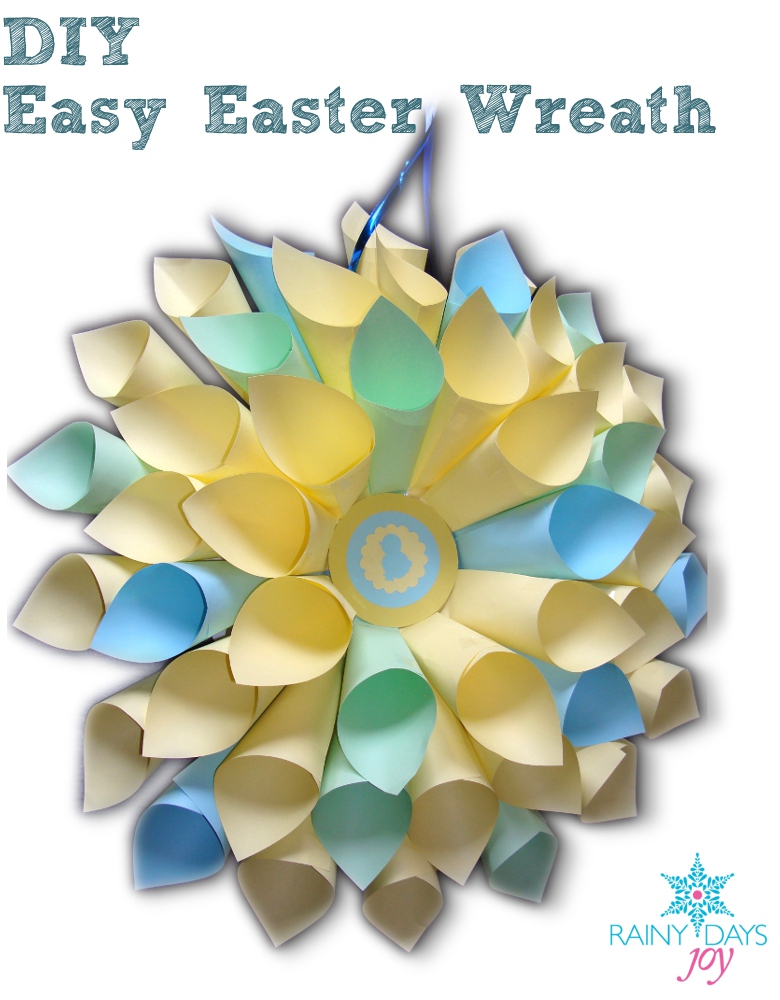
You will need:
- Cardboard for the base of the wreath. Any kind of cardboard will do, I used an old cerial box.
- Around 40 or 50 Coloured paper squares. I bought a pastel-coloured paper block from Officeworks.
- Sticky tape
- Couple circle cut outs to be attached to the middle of the wreath. I have couple different circle punches which I used, but you can just cut out couple different sized circles using a coffee cup as a template.
- Some string to hang the wreath. Mine is just gift wrapping sting.
1. Cut out a circle from the cardboard . I used a dinner plate as my template.
2. Roll the paper scones and use sticky tape to secure them. Then arrange them to the cardboard base, and attach with sticky tape. With the first layer, leave some space between the cones.

3. Make the second layer.

4. And then the third, and last layer. Glue or stick the circles to the middle of the wreath using glue (if you have any) or sticky tape.

HAPPY EASTER!
------
Check out Rainy Days Joy's brilliant craft packages from www.rainydaysjoy.com.au
or see more craft ideas and news from our facebook page: www.facebook.com/RainyDaysJoy
Monday, 4 February 2013
DIY Napkin bunting
This bunting is easy, fast and really inexpencive way to decorate your party (or a craft market stall as I did :-D ). All you need is: napkins, some paper doilies, string or twine, scissors to cut the string and a stapler. It looks great, and it takes only 10 minutes to make one. Enjoy!


Follow Rainy Days Joy at facebook: www.facebook.com/RainyDaysJoy


Follow Rainy Days Joy at facebook: www.facebook.com/RainyDaysJoy
Thursday, 20 December 2012


Wreath, wreath and wreath
I made three wreaths last weekend - the first one was for my dear friends at Sabre Lou Products, Troy and Shane. They make beautiful sentenced soy candles and waxes. This wreath was not actually Christmas themed, but it was a Christmas present for them. It was made using a styrofoam wreath-base, yarn, felt flowers (tried to copy the look they have in their logo) and their logo glued in the middle. I didn't take any picks while making it, but basically you just roll the yarn around the styrofoam base, glue the flowers (there's a tutorial HERE how to make them), print the picture and glue it to a slightly bigger cardboard and glue it to the backside of the wreath.
 The second wreath was for my friend Paula, who invited us for a visit. This is made of Christmas ornaments glued to a cardboard base. I'll post the tutorial for this later today.

And while the glue gun was still hot, I decided to make one more wreath to our own door. Our color theme this year is blue and silver, and luckily our door is blue too. It fits perfectly!
 HAPPY HOLIDAYS!


And while the glue gun was still hot, I decided to make one more wreath to our own door. Our color theme this year is blue and silver, and luckily our door is blue too. It fits perfectly!

Tuesday, 18 September 2012
100 days untill Christmas
It's all about Christmas now! I didn't quite understand how early you should start planning and creating Christmas products when you are in crafting business - I'm already a bit late. Luckily I have a lot of ideas spinning in my head, Christmas crafting has always been a big thing at our household so I do have around billion ideas what to do. Now I just have to organize all of them and choose the best ones. But here's a sneak peek for you; I hope Australians will get excited about these very Scandinavian style Christmas Elves. P.S. This package will be one of those "no glue or scissors needed = no mess" craft packages. Jei!


Thursday, 16 August 2012
Felt flower ideas - decorate and upcycle with mimal budget!
In one of the earlier blog posts I wrote how to do these gorgeous felt flowers. I personally fell in love with them, and nowadays they are part of my product selection at the craft markets. I've also decorated a lot of items here at home with them. Here's some ideas what I did with them - they are just perfect and cheap little decorations to upcycle and personalize many different things.
I will soon update the webshop with these felt flower packages, in case you don't have the time or energy to do them yourself. So stay tuned and check www.rainydaysjoy.com.au and www.facebook.com/RainyDaysJoy for more info!
1. (recycled) Tealight candle holder.
I first rolled some white yarn around an old small glass cup, using craft glue to stick the yarn to the glass. Then just glued the felt flower. It looks REALLY good with a candle burning inside.


5. Scarf.
I love scarfs, and of course I had to have a matching scarf to my new gorgeous hairband.

I will soon update the webshop with these felt flower packages, in case you don't have the time or energy to do them yourself. So stay tuned and check www.rainydaysjoy.com.au and www.facebook.com/RainyDaysJoy for more info!
1. (recycled) Tealight candle holder.
I first rolled some white yarn around an old small glass cup, using craft glue to stick the yarn to the glass. Then just glued the felt flower. It looks REALLY good with a candle burning inside.
2. Canvas.
I glued the flowers to the canvas with craft glue. The canvas was around $2 at K-Mart.

3. Photoframe.
This is a cheap wooden frame from Ikea, which I have spraypainted white. Glue the felt flowers to the corners with craft glue.
4. Hairband.
This basic black hairband was $3 from K-mart, and the felt flowers are sewn into it with couple simple stitches. 
5. Scarf.
I love scarfs, and of course I had to have a matching scarf to my new gorgeous hairband.

Next project with these felt flowers will be couple pillows to our sofa. I'll post a picture when it's finished, but I'm sure it will look great with the frame, tealight holder, and the canvas!
Subscribe to:
Posts (Atom)